How to Build a DIY 2.5Gbps Home Network and Tame Your Wiring Closet
- Muddy Ruttzz
- Feb 16
- 10 min read
Updated: Feb 27
Whether you are a retired sheet metal worker like me or just a frustrated homeowner, building a DIY 2.5Gbps Home Network is the best way to get the speeds you are actually paying for. Most modern homes have a "rats nest" of wires hidden in a closet, but they aren't utilized. By moving away from "all-in-one" ISP boxes and installing dedicated multi-gigabit hardware, you can future-proof your home office and eliminate Wi-Fi dead zones.
Muddy Ruttzz Youtube Channel
My Articles and videos are unsponsored and all opinions are my own.
Support Us! Use my ✅ affiliate links throughout and at the end of this article. I get a commission without any additional cost to you. You don't have to buy the listed product. I get credit if you click and purchase anything within 24 hours. Your support means the world to me! Learn More

Cleaning Up the "Rats Nest" in Your Structured Wiring Panel
Buying a new house is an exciting milestone, but it often reveals a long list of things left for the owner to customize. Taking a house and turning it into a home requires time, resources, and a fair amount of money. I already managed to clear one hurdle by tackling a major DIY landscaping project to get the exterior in shape, but this nightmare closet inside the house remained a constant source of frustration.
I knew that to achieve a true DIY 2-5Gbps home network, I first had to deal with the "rats nest" of tangled wires in my structured wiring panel. From that cabinet, ethernet and coaxial cables are routed to every room in the house, but they were a mess of unlabeled, disorganized loops. My plan was to straighten out the chaos, relocate the existing home alarm module to make room for new gear, and finally utilize those pre-run lines to provide high-speed internet to my office and the rest of the home.


The Best Hardware for a DIY 2.5Gbps Home Network
I did my research and found out that TP-Link is hands-down the best choice for value and cutting-edge home networking equipment. I made my choices after determining the specific components I would need to build a system that would serve my needs as a content creator. To ensure a true DIY 2.5Gbps home network, I focused on hardware that supported multi-gigabit speeds from the street to my desk.
While I started with the Arris S33, I ultimately had to pivot to a specific Netgear model to satisfy Xfinity’s certification requirements for enhanced upload performance. Here is the final list of gear I used to build out my system:
Arris SURFboard S33: A high-performance DOCSIS 3.1 Modem (Standard Speed Certified).
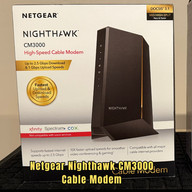
Netgear Nighthawk CM3000: The alternative modem I purchased because it is officially certified by Xfinity for "Next Gen" enhanced upload speeds. Xfinity’s Official "Next-Gen Speed Tier" Compatible Device List
TP-Link Omada ER707-M2: A 7-port multi-gigabit VPN router that acts as the brain of the network.
TP-Link DS108G-M2: An 8-port 2.5Gbps unmanaged desktop switch to feed every room in the house.
TP-Link Archer AXE7800 (AXE95): A powerful Tri-Band Wi-Fi 6E router that I configured to run as a dedicated access point. Wifi Standards Explained

Why I Swapped the Arris S33 for the Netgear Nighthawk CM3000
During this DIY 2.5Gbps home network project, I learned that not all hardware is created equal. For instance, while the Arris S33 is a great modem, it wasn't certified by Xfinity for their "Enhanced Speed" tiers. To unlock the high upload speeds of my 1-Gig plan, I had to switch to the Netgear Nighthawk CM3000. Additionally, I found that my Mac Mini’s built-in port was a bottleneck, so I used a J5 Create Ethernet to USB-C adapter to finally see those triple-digit upload speeds.
Feature | Arris SURFboard S33 | Netgear Nighthawk CM3000 |
Xfinity Certification | Recommended (Standard) | Next Gen Speed Tier Certified |
Max Download Speed | Up to 2.5 Gbps | Up to 2.5 Gbps |
Max Upload Speed (Standard) | ~35 - 40 Mbps | ~35 - 40 Mbps |
Max Upload Speed (Enhanced) | Capped at ~40 Mbps | Up to 300 - 450+ Mbps |
Mid-Split Support | No (Limited by Firmware) | Yes (Full Support) |
Primary Port | 2.5Gbps Ethernet | 2.5Gbps Ethernet |
Best For | Standard Gigabit Plans | Content Creators & Upload Heavy Use |
What is DOCSIS? Data Over Cable Service Interface Specification (DOCSIS)

Step-by-Step Installation: From Sheet Metal Pro to Network Amateur
Transitioning from 40 years of sheet metal work to home networking was a steep learning curve, but I treated it like any other DIY project: one step at a time. To build a reliable DIY 2.5Gbps home network, I had to be methodical about how I organized the hardware and the cabling. Here is the process I used to turn that wiring nightmare into a pro-grade setup:
Clear the Deck: The first order of business was making room. I relocated the old security module to a higher spot in the cabinet and added a velcro-mounted power strip to handle all the "power bricks" for the new equipment.
Label Everything: Don't skip this! I spent the time to identify and label every Ethernet and Coaxial pair so I would know exactly which room each cable served.
The Trim: I shortened the long, messy factory cables and used my Solsop pass-through crimper to install fresh RJ45 connectors. This made the cabinet look much cleaner and ensured I had custom-length runs.
The Stack: My connection logic was straightforward: Street Coax connects to the Modem, the Modem feeds the ER707-M2 Router, and the Router feeds the 8-port Switch.
The Juice: Once everything was plugged in, every wall jack in the house became live with high-speed data..

Managing Power and Heat in a Small Media Cabinet
I originally wanted to fit all the networking components and my power source directly within the structured media cabinet, but I quickly realized those bulky "power brick" plugs made that impossible. Beyond the space issue, I also realized the collection of equipment generated quite a bit of heat to be contained in such a small enclosure, especially since the cabinet is located inside a tight hallway closet. To solve this, I found a 12-outlet surge protector that could accommodate the wide plugs and was short enough to mount on the wall directly under the cabinet.
Relocating the power strip removed a significant heat source from the enclosure, which is vital for maintaining a stable DIY 2.5Gbps home network. Interestingly, swapping out the Arris S33 modem for the Netgear CM3000 also helped with the temperature. The S33 is notoriously known as a "hot top" because of how much heat it generates in a small footprint, whereas the CM3000 tends to run cooler largely because its components are housed in a larger, better-ventilated casing.
Complete RJ45 Guide: How to Install 3-Piece RJ45 Connectors: A Pro Guide for DIY Networking

Mastering the 3-Piece Ethernet Connector (A 64-Year-Old’s Perspective)
I’m not trying to make a technical instructional video here—I’ll save that for later—but I really want to share my experience of doing this for the first time. To get a true DIY 2.5Gbps home network, you need solid connections. At first, I tried standard one-piece connectors that require you to cut the wires to an exact length and feed them in perfectly. After two hours of frustration, I almost gave up. I thought I'd never get those tiny wires through those tiny holes.
That’s when I switched to 3-piece connectors consisting of a spacer, a load bar, and the connector itself. These were a total game-changer. As a 64-year-old man who has had carpal tunnel surgery and doesn't have the vision I once did, I had to get creative. I set up a "mobile lab" on my service cart in the hallway, used excellent lighting, and wore a jeweler’s headband magnifier with a small LED headlamp attached to it. I even wore nitrile gloves with "grippers" to handle the wires.
The spacer is the secret sauce; it maintains the correct distance between the twisted strands, which is vital for maintaining the fastest speeds on Cat6 cable. After some practice with my Solsop pass-through crimper, I went from being ready to quit to being a confident installer. If I can do it, you definitely can too. How To Reduce Crosstalk in Data Communication

Testing the Connection: Verification and Labeling
Once the hardware was in place, the final step was ensuring every connection was rock solid. I found a very cool kit that included an RJ45 crimper and a POE 300M Cable Tester. This is a two-piece device that allows you to test the entire length of the Ethernet cable and verify the quality of your RJ45 connector installation. For an amateur like me, having that visual confirmation that all eight pins were firing correctly was a huge confidence booster for my DIY 2.5Gbps home network.
As a major bonus, the tester solved my mystery wire problem. Since nothing was labeled when I bought the house, I was able to connect the remote side of the tester to a cable in the media closet and then walk from room to room with the master unit. When the lights on the wall jack matched the tester, I knew exactly which room I was looking at. This allowed me to finally label every line and finish the project with a clean, organized, and—most importantly—high-speed network that actually delivers the gigabit performance I’m paying for.

Maximizing Speed on the Mac Mini with a USB-C Ethernet Adapter
Even after I finished the DIY 2.5Gbps home network installation in the closet, I ran into one final hurdle at my desk. I noticed that the built-in Ethernet port on my Mac Mini wasn't delivering the full upload speeds I was expecting from my new Netgear CM3000 modem. After a bit of troubleshooting, I discovered that the internal port was limited, but the USB-C (Thunderbolt) ports were not.
To solve this, I purchased a J5Create Ethernet to USB-C adapter. By bypassing the internal port and plugging my Cat6 line directly into the adapter, I finally saw the massive jump in performance I had been working toward. This simple $30 fix was the "key" to unlocking the high-speed video uploads I need for the Muddy Ruttzz YouTube channel. It just goes to show that in a high-speed network, you are only as fast as your weakest link!

The "Secret" Diagnostic Tool: Terminal and Command Prompt
Before you start buying new gear, you need to see what your computer is actually seeing. Most people use a web-based speed test, but those can be affected by browser lag. For the most accurate "straight from the tap" data, use your computer's built-in command-line tools.
For Mac Users (Terminal)
Open the Terminal App (Cmd + Space, type "Terminal") and type: networkQuality This gives you a pro-level report on your "Responsiveness" (measured in RPM), which tells you if your network can handle high-demand tasks like video conferencing or large uploads without stuttering.
For PC Users (Command Prompt)
On Windows, you can use the Command Prompt (Start, type "cmd") to run a continuous test. Type: ping -t 8.8.8.8 This will show you a live feed of your "Latency." If the time (ms) is high or inconsistent, you have a bottleneck. To see if your machine is even seeing your 2.5Gbps hardware correctly, type: netsh interface show interface This will list your active connections and their maximum theoretical speeds, helping you spot if a bad cable is capping you at 100Mbps.
Conclusion: Lessons from a Network Amateur
Building a DIY 2.5Gbps home network was a journey that took me from a "sinking feeling" in a messy closet to the high-speed connectivity I need for my garage studio and YouTube channel. As a retired sheet metal worker, I had to step out of my comfort zone and learn that networking isn't just about cables—it's about choosing the right hardware and having the patience to troubleshoot the small stuff.
The biggest takeaway for me was realizing that your ISP’s "all-in-one" box is often the biggest bottleneck in your home. By taking control of the hardware—from the Netgear CM3000 down to the j5create adapter—I finally stopped paying for speed I wasn't getting. If you are staring at a mess of wires in your own hallway closet, don't let it intimidate you. With a solid plan, the right tools, and a bit of DIY grit, you can unlock a pro-grade network that's ready for the future.
On Muddy Ruttzz, the best is yet to come!
#HomeNetworking #DIY #MuddyRuttzz #2.5Gbps #NetgearNighthawk #TPLinkOmada #HomeOffice #TechTips #XfinitySpeedTest #MacMini #J5Create
Merch Section
Netgear Nighthawk CM3000 Modem – Certified for Xfinity "Next Gen" enhanced upload speeds.
Arris SURFboard S33 Modem – High-performance DOCSIS 3.1 with a 2.5Gbps port.
TP-Link Omada ER707-M2 Router – Multi-Gigabit VPN router with dual 2.5G ports.
TP-Link DS108G-M2 Switch – 8-Port 2.5Gbps unmanaged desktop switch.
TP-Link Archer AXE7800 (AXE95) – Tri-Band Wi-Fi 6E router for use as a dedicated Access Point.
Tools & Accessories
Solsop Pass-Through RJ45 Crimp Tool Kit – Includes the crimper and the POE 300M tester.
j5create USB-C to Ethernet Adapter – Essential for getting 2.5Gbps speeds on a Mac Mini.
12-Outlet Surge Protector – Ideal for managing bulky power bricks and reducing cabinet heat.

✅ - Zarges Aluminum Cases - Best Made Overlanding Storage Cases. When you require the best protection for you gear. Bear Resitant available. (Zarges)

✅ - MERCH Availabe on Spreadshop - Awesome Original Design Shirts and Merch - Muddy Ruttzz Clothing.
Click Here to See my Zarges Blogpost.
Affiliate Disclosure
As a Amazon Affiliate and Ebay Partner I receive a commission if you use my links to make a qualifying purchase. It does not raise the price you pay.


