WARNING: Don't Do Your EcoDiesel Oil & Filter Change Until You Read This!

Updated: Aug 31
Affiliate Disclosure: This post is unsponsored, I don't take products for free to do reviews on them. To support the studio, I use affiliate links from Amazon and eBay. If you click and purchase, I may earn a small commission at no extra cost to you.
📌 TL;DR / Quick Summary
Don’t Rely Solely on Factory Gauges: EcoDiesel engines require strict 5,000-mile service intervals rather than waiting for dash reminders or extended manual recommendations.
Never Skip the Fuel Filter: Neglecting your fuel filter/water separator can lead to catastrophic, multi-thousand-dollar fuel pump and injector failures.
Do the Complete 4-Filter Routine: Replacing your oil, fuel, engine air, and cabin air filters all at once saves money, protects your engine, and keeps your rig running reliably.
Budget-Friendly DIY: Using a complete 4-filter kit lets you service all your filters for roughly the price of a single dealership oil filter.
What You Will Learn In This Post
Maintaining a 3.0L EcoDiesel engine requires more than just a standard oil drain and refill. Because diesel engines demand ultra-clean fuel and low-ash synthetic oil, skipping critical filters or waiting too long between service intervals can lead to severe and expensive engine damage. In this comprehensive DIY guide, you'll discover why a complete maintenance routine every 5,000 miles is the key to engine longevity.
You will get practical, step-by-step instructions for performing a full vehicle service right in your garage:
The Oil Change Process: Proper oil specifications (Chrysler MS-12991), torque specs (25 Nm), socket sizes, and tips to keep the job clean.
The Fuel Filter / Water Separator Service: Step-by-step removal of the skid plate, draining fuel via the petcock, replacing O-rings, and priming the system safely.
Engine & Cabin Air Filter Replacements: Quick walkthroughs to replace the engine intake filter and locate the hidden two-piece cabin filter behind the glove box.
Cost-Saving Tips: How using a complete 4-filter kit lets you perform double the maintenance at a fraction of dealership prices.
Whether you drive an EcoDiesel Wrangler, Gladiator, or Ram, this guide walks you through every tool, socket size, and pro-tip you need to knock out all four filters quickly, cleanly, and with total peace of mind.
The Truth About EcoDiesel Maintenance
The 2 big mistakes Ecodiesel owners make when it comes to routine maintenance on their rigs are:
Believing the instrument cluster oil life gauge when it tells you what percentage of oil life is left.
Using the manual as a guide to tell you what mileage to change the other (engine air, fuel, cabin air) all the other critical filters on the vehicle.
This guide gives you the full, tried-and-true maintenance method going beyond an Ecodiesel oil filter change and includes the 3 often forgotten filters that keep your Wrangler EcoDiesel (and Gladiator/Ram models) running great. I'll show you what my quick 6-minute video covers, but here, we'll get into the nitty-gritty. As a fellow Jeep owner in dusty Las Cruces, NM, I've honed this process to be quick, efficient, and budget-friendly, so I can service my ride every 5,000 miles.

The Critical Mistake: Why The EcoDiesel Oil & All Filters Change is Essential
Why You Can't Skip the Fuel Filter
Here's the deal with diesel engines: they need you to be super picky about keeping the fuel clean, way more than gas engines do. That's the main takeaway from the "WARNING" in the title. If your fuel filter gets clogged or isn't working right, it can quietly cause some serious damage, like messing up the injectors or the high-pressure fuel pump, which can cost you big time.
Want to know about the different types of diesel fuel available? I have a deep dive article and video explaining the difference between Regular Diesel and Bio diesel.

The Doc's Diesel Filter Kit: 4 OEM Quality Filters That Help Make Diesel Maintenance Affordable
The EcoDiesel Fuel Filter is often overlooked by DIYers focused only on oil, but neglecting it dramatically increases the chance of a catastrophic breakdown. We don't just change the fuel filter—we use the best. By purchasing the filter kit from Doc's Diesel Filters, I discovered I can change the oil filter, the engine air filter, the fuel filter, and the cabin air filter for about roughly the same price as a single oil filter from the dealer. That’s why I can afford to do my maintenance twice as often as recommended!
Easy DIY Maintenance: Step by Step How I Change The Oil & Filters On My Wrangler & Gladiator Ecodiesels
It is critical to use a good quality full synthetic oil in the 3.0 Liter Ecodiesel that meets the Chrysler MS-12991 oil designation. The oil is an important part of the emissions system and is designed to be "Low Ash Producing." Check this article out to learn about Ash and motor oils.
Part 1: The Oil Change: Tip And Tricks To Make It Easier


Part 1: The Engine Oil & Filter Change - Step-by-Step
Drain the Oil: Warm the engine up slightly to help the oil flow smoothly. Using a 13 mm socket, remove the oil pan drain plug and let the oil drain completely. The 3.0L EcoDiesel holds roughly 9 quarts, so ensure your drain pan has plenty of capacity.
Remove the Oil Filter: The top-mounted oil filter housing is easy to access, though a few hoses surround it. Place a couple of shop rags underneath the housing to catch any stray drips. Use a 27 mm (or 1-1/16") socket with an extension to unscrew the cap and lift out the old cartridge filter.
Clean the Housing: Soak up any residual oil resting in the bottom of the filter housing with a clean rag.
Prep the New Filter: Always lubricate the new O-rings on the replacement cartridge filter with fresh engine oil prior to installation.
Install and Torque: Seat the new filter into the housing and carefully thread the cap back on. Use a torque wrench to tighten the cap to 25 Newton-meters (18.4 ft-lbs). Torquing this housing accurately is critical—you do not want it too loose or over-tightened.
Reinstall Drain Plug & Refill: Ensure the oil pan drain plug is reinstalled and torqued before pouring new oil into the engine. Add roughly 8.5 quarts of MS-12991 certified synthetic oil (such as Pennzoil Platinum Euro or Amsoil), check the dipstick, start the engine briefly, and top off as needed to reach the full mark.
Reset the Oil Life Monitor: Navigate to the oil life screen on your instrument cluster and press/hold the "OK" button on your steering wheel until it resets to 100%.
Dispose of Waste Oil Responsibly: Bring your used motor oil to an auto parts retailer or municipal recycling center for proper disposal.
Oil Change Complete! That Was Slick!
I began my illustrious career as an oil-changing prodigy at the tender age of 9 or 10. Every time I give my car a fresh dose of oil, I swear it starts humming a happy tune and running like it's auditioning for a car commercial. Of course, that might just be my overactive imagination. But hey, regular oil changes are like spa treatments for your engine—they help it live a long, happy life and perform like a superstar!
Part 2: Fuel Filter Change - Often Neglected But Incredibly Important


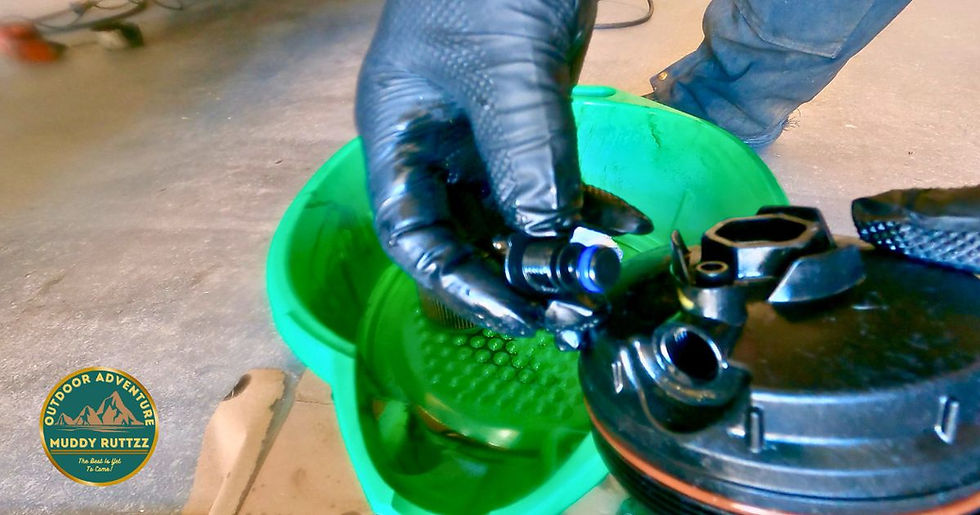


Mechanic's Tip: Always wear heavy-duty nitrile gloves to protect your skin from diesel fuel and harsh chemicals. Touchscreen-compatible textured gloves allow you to use your smartphone or camera without taking them off.

Part 2: The Fuel Filter & Water Separator Change Step-by-Step
Locate the Filter: The fuel filter/water separator is mounted on the driver's side inside the frame rail, protected by a heavy steel skid plate.
Remove the Skid Plate: Use a 10 mm socket to remove the three mounting bolts holding the skid guard in place.
Drain the Fuel: Open the petcock valve to drain standing fuel into a small catch container.
Remove Filter Housing Cap: Using a 28 mm socket, unscrew the filter housing cap. The cartridge filter will come out attached to the cap. Keep a drain pan underneath to catch any residual fuel.
Replace O-Rings: Separate the old filter from the cap and discard the old O-ring. Install the new O-ring provided in the kit onto the housing cap and lubricate all seals with clean diesel or fresh oil.
Install New Filter: Snap the new filter into the housing cap until it locks into position.
Reassemble & Align: Thread the housing cap back into place and tighten it securely. Ensure the water drain petcock lines up with the cutout notch in the skid plate.
Reinstall Skid Plate: Secure the skid plate using the three 10 mm bolts.
Prime the Fuel System: Do not crank the engine dry! Push the vehicle start button to the RUN position (with your foot off the brake pedal) for 30 seconds to let the electric lift pump prime and fill the fuel filter canister. Turn the ignition off and repeat this priming cycle once more before starting the engine.
Part 3: The Air Filter Change: The Easiest Way to Give Your Car a Breath of Fresh Air


Part 3: The Engine Air Filter Replacement Step-by-Step
Locate the engine air box on the passenger side of the engine bay.
Remove the four 10 mm screws securing the air filter housing lid.
Lift the lid, remove the old intake filter, wipe out any dirt or debris from the air box tray, and install the new filter firmly into place.
Reinstall the lid and snug down the four bolts.
Step 4: The Cabin Air Filter: Wait, My Car Has A Filter For The Air I Breathe?
Who knew our cars were secretly air purifiers? How many people even have a clue about this hidden gem? Its in a strange place but I'll show you in my photos.


Part 4: The Cabin Air Filter Replacement Step-by-Step
Lower and unclip the glove compartment assembly to access the filter access door.
Squeeze the retention clips on the rectangular access door and remove it.
Slide out the two-piece cabin air filter assembly.
Insert the new filters one at a time, ensuring the airflow direction arrows point downward.
Snap the access door back on and reinstall the glove box.
Conclusion: The Proven Way to Peace of Mind
The core message of my EcoDiesel filter change is simple: The PROVEN method isn't just about speed; it's about completeness (Oil + Fuel + Air + Cabin). By taking just a few minutes, you save hundreds of dollars and add thousands of miles to the life of your Jeep EcoDiesel.
The best way to learn is by watching.
WATCH THE FULL 6 MINUTE VIDEO HERE: https://youtu.be/jKou5YknrUM
Call To Action:
Check out more DIY articles on The Muddy Ruttzz Gazette and my videos on Muddy Ruttzz Youtube. I have awesome overlanding adventures too. Thanks for visiting my website!
About the Author
Muddy Ruttzz is a digital creator, overlander, and DIY builder documenting rugged vehicle builds and outdoor adventures. Backed by a career in industrial sheet metal fabrication, heavy infrastructure construction, and mechanical maintenance, he provides practical, trade-tested technical guides for real-world off-road performance.
Amazon Shopping
✅ - Doc's Diesel Wrangler/Gladiator Ecodiesel Filter Kit - https://amzn.to/4o9IMhO - (Amazon)
✅ - Pennzoil Euro Synthetic MS - 129991 Spec Oil - https://amzn.to/4o9IMhO - (Amazon)
✅ - Oil Drain Pans Variety of Options - https://amzn.to/4pp2CGI - (Amazon)
✅ - TitanFlex Nytrile Gloves w/Thorgrip - https://amzn.to/48giGDW - (Amazon)
✅ - Amsoil Products - https://amzn.to/4prrspz - (Amazon)
✅ - Use this link to purchase anything on Amazon - https://amzn.to/3K8Idqy - (Amazon)
✅ - Dana Performance Diff Cover Wrangler JL Gladiator JT - https://ebay.us/DlpfWm
✅ - Amasoil 75-90 Differential Fluid - https://ebay.us/jW9jka (eBay)
✅ - Reinzosil Universal RTV - https://ebay.us/dv3vWr (eBay)

✅ - Zarges Aluminum Cases - Best Made Overlanding Storage Cases. When you require the best protection for you gear. Bear Resitant available. (Zarges)

✅ - MERCH Availabe on Spreadshop - Awesome Original Design Shirts and Merch - Muddy Ruttzz Clothing.
Click Here to See my Zarges Blogpost.
Affiliate Disclosure
As a Amazon Affiliate and Ebay Partner I receive a commission if you use my links to make a qualifying purchase. It does not raise the price you pay.

Purchase On Amazon 
Purchase On Amazon 
Purchase On Zarges Website 
Purchase Case On Zarges Websit


